
Cloud Functions
まず、Slash Command のペイロードを受け取るアプリ( Cloud Functions )の設定を行います。
Slash Command が実行されると、認証しているアプリに HTTP POST を送信します。そして、このリクエストにはソースコマンドとそれを起動した人を説明するペイロードが含まれています。(※ペイロードに含まれる各パラメータの意味は後述します。)
token=gIkuvaNzQIHg97ATvDxqgjtO
&team_id=T0001
&team_domain=example
&enterprise_id=E0001
&enterprise_name=Globular%20Construct%20Inc
&channel_id=C2147483705
&channel_name=test
&user_id=U2147483697
&user_name=Steve
&command=/weather
&text=94070
&response_url=https://hooks.slack.com/commands/1234/5678
&trigger_id=13345224609.738474920.8088930838d88f008e0
&api_app_id=A123456このペイロードは、Content-typeヘッダーをapplication/x-www-form-urlencodedに設定して送信されます。
関数の設定
Slash Command は認証しているアプリに HTTP POST を送信するので、トリガーは HTTP 、そして認証は 未認証の呼び出しを許可 を設定します。
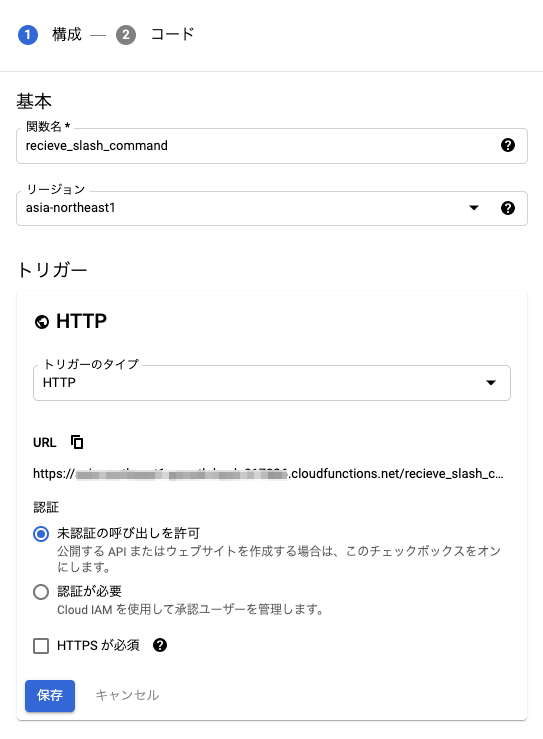
関数のデプロイは、GUI でも Cloud SDK でも大丈夫です。好きな方で良いと思います。
プログラム
application/x-www-form-urlencodedで POST 送信されるデータは、Cloud Functions のflask.request.formで受け取ることができます。
def main(request):

  # ペイロードの各パラメータの値を取得する
  token = request.form.get('token')
  team_id = request.form.get('team_id')
  team_domain = request.form.get('team_domain')
  channel_id = request.form.get('channel_id')
  channel_name = request.form.get('channel_name')
  user_id = request.form.get('user_id')
  user_name = request.form.get('user_name')
  command = request.form.get('command')
  text = request.form.get('text')
  api_app_id = request.form.get('api_app_id')
  is_enterprise_install = request.form.get('is_enterprise_install')
  response_url = request.form.get('response_url')
  trigger_id = request.form.get('trigger_id')

  # エフェメラルメッセージの設定
  msg = {
    "blocks": [
      {
        "type": "section",
        "text": {
          "type": "mrkdwn",
          "text": f"<@{user_id}> さん、こんにちは :wave:\nSlash Command のペイロードをお送りします。"
        }
      },
      {
        "type": "section",
        "text": {
          "type": "mrkdwn",
          "text": f">• token: `{token}`\n>• team_id: `{team_id}`\n>• team_domain: `{team_domain}`\n>• channel_id: `{channel_id}`\n>• channel_name: `{channel_name}`\n>• user_id: `{user_id}`\n>• user_name: `{user_name}`\n>• command: `{command}`\n>• text: `{text}`\n>• api_app_id: `{api_app_id}`\n>• is_enterprise_install: `{is_enterprise_install}`\n>• response_url: `{response_url}`\n>• trigger_id: `{trigger_id}`"
        }
      }
    ]
  }
  return msg
リクエスト URL を控える
関数のデプロイが完了したら、リクエスト URL を控えます。
リクエスト URL :https://{REGION}-{PROJECT_ID}.cloudfunctions.net/{FUNCTION_NAME}

Slack
Slack App を作成
https://api.slack.com/apps で Slack App を作成します。

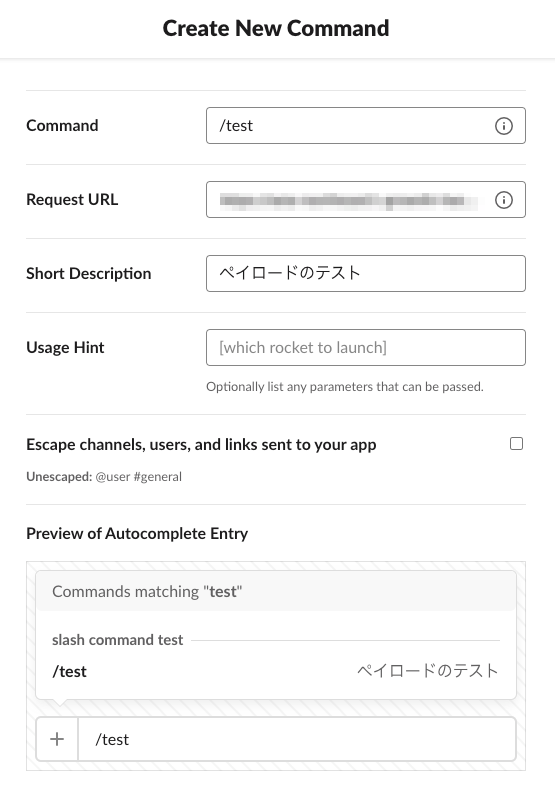
Slash Command の設定
Slash Command を作成します。
Request URL に先程取得したURLを入力することで、Slash Command が実行されるたびに Cloud Functions にセットした関数が実行されます。
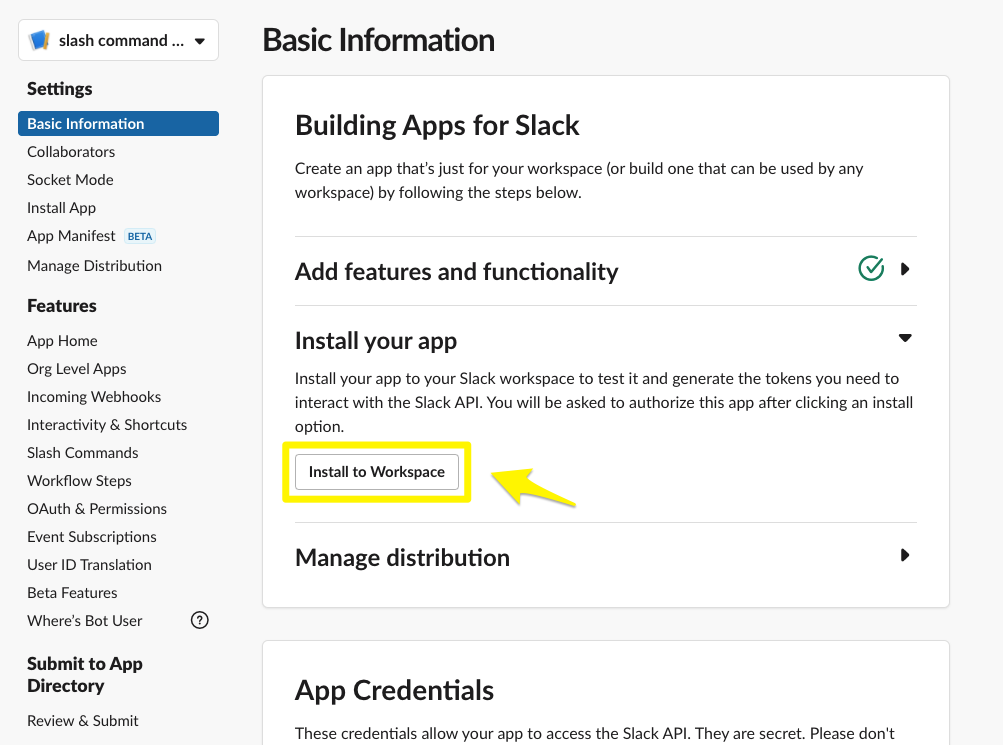
Slack App をワークスペースにインストールします。
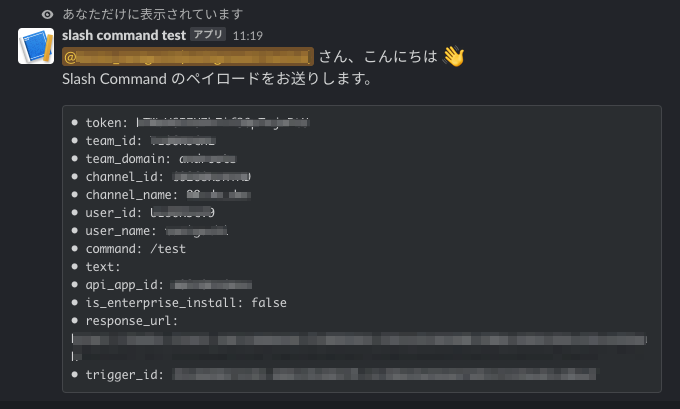
Slash Command を実行してみる
/testを実行して、下のようなエフェメラルメッセージ(あなただけに表示されています)が返ってくれば成功です。
ペイロードの各パラメータの説明
token=gIkuvaNzQIHg97ATvDxqgjtO
&team_id=T0001
&team_domain=example
&enterprise_id=E0001
&enterprise_name=Globular%20Construct%20Inc
&channel_id=C2147483705
&channel_name=test
&user_id=U2147483697
&user_name=Steve
&command=/weather
&text=94070
&response_url=https://hooks.slack.com/commands/1234/5678
&trigger_id=13345224609.738474920.8088930838d88f008e0
&api_app_id=A123456| パラメータ | 説明 |
|---|---|
token | 非推奨 |
team_id | ワークスペースの ID |
team_domain | ワークスペースのサブドメイン |
enterprise_id | エンタープライズ ID 、Enterprise Grid プランのみ |
enterprise_name | エンタープライズ名 、Enterprise Grid プランのみ |
channel_id | コマンドが入力されたチャンネル ID |
channel_name | コマンドが入力されたチャンネル名 |
user_id | コマンドを入力したユーザー ID |
user_name | コマンドを入力したユーザー名 |
command | コマンド |
text | コマンドと一緒に添えられた文字列 |
response_url | メッセージの応答を生成するために使用できる一時的な Webhook の URL |
trigger_id | モーダルウィンドウを開くために必要な ID |
api_app_id | Slack App ID |

コメント